There is little left for Halloween and although most of the little ones do not know where that Halloween comes from, pumpkins and skeletons, it is more, probably most do not even care to know it and all they want is to know where the sweets are.
That is why many parents end up giving in to the evidence that celebrating a costume party is a fun way to spend time with family and friends, so if you are like me, looking for pumpkins, bats and fantasies more to decorate the house maybe this DIY: paint Halloween faces in simple steps I come with pearls.
First step

With a sponge and white face paint, cover your child's face avoiding lips and eyes. It is convenient to use a hand to place it on your child's head so that it does not move (without going over) and also allows you to have a foothold.
Second step

Once we have the whiter child than a Duke of the Isabeline Court, and the paint has dried, we go on extending using the tip of the gray paint sponge, covering the hitherto non-existent dark circles, eyelids and cheekbones. Then draw shadows making a grape that goes from the beginning of the forehead to join at the point between the tabs. Be careful that if you paint dad the beginning of the forehead may be a bit far.
Third step

We wait for the last layer to dry, we repeat "do not touch your face" every five seconds, we review the paint that has moved a couple of times and move on to the final part.
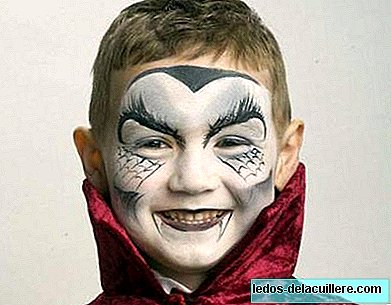
With some brushes and black paint, we add some hair on the forehead as a grandfather of the Adams family, we add a little volume to the eyebrows, we paint the lips black (we warn you not to suck the paint, at least until they arrive at the party), we paint some spider webs on the cheekbones, a little gray on the cheeks and of course, terrifying fangs.
Once we are done and we are ready to go hunting for candy.
Trick or Treating!